Welcome to your all-in-one guide for mastering our Restaurant Booking System! We’re excited to help you streamline your reservation process, optimise table management, and enhance the overall dining experience for your customers.
This training manual is designed to provide you with a step-by-step approach to set up and use the various features of the system. Whether you're configuring your restaurant’s profile, managing daily bookings, or setting up seasonal schedules, we’ve got you covered. Each section of this guide is organised to walk you through key features, settings, and options so that you can get the most out of the system with minimal hassle.
In the pages ahead, you’ll learn how to:
- Register your restaurant - Enter the basic information needed to register your restaurant, such as your restaurant name, Postcode and contact details.
- Set Up Your Restaurant Profile – Enter essential details about your restaurant, such as your address, contact information, and dining options.
- Configure Opening and Closing Times – Define your standard operating hours, seasonal schedules, and holiday closures.
- Manage Dining Areas and Tables – Set up various dining sections, customise table arrangements, and apply rules for joining tables.
- Create Sittings for Different Meal Times – Establish specific times for breakfast, lunch, dinner, and other meal periods.
- Add and Manage Staff – Assign roles and set permissions to ensure everyone on your team has the appropriate access.
- Handle Bookings – From creating new reservations to updating booking statuses, you’ll learn how to efficiently manage daily bookings in real-time.
- Use Advanced Features – Leverage additional tools like the right-hand side menu options to find bookings, track no-shows, and navigate between dates.
- Orphan Bookings - Orphan bookings when a booking becomes detached from the date or time that it was originally booked for.
This manual is for everyone involved in managing your restaurant’s bookings, from Restaurant Managers to front-of-house staff. Whether you’re responsible for setting up profiles and schedules or simply need to check in guests, this guide will help you get started quickly.
Each section is organised with clear, step-by-step instructions. We’ve also included helpful tips, definitions, and FAQ sections to address any questions that may come up along the way. Here’s a quick breakdown of what you’ll find:
- Step-by-Step Instructions – Follow each guide to complete specific tasks, like creating a new booking or adjusting table settings.
- Glossary – Refer to the glossary for definitions of common terms and concepts within the booking system.
- FAQs – Find answers to frequently asked questions that may arise during setup and daily use.
Our booking system is designed to simplify your day-to-day operations and enhance the customer experience. By setting up the system according to your unique needs, you’ll be able to:
- Maximise Efficiency: Manage bookings, reduce no-shows, and optimise table turnover effortlessly.
- Enhance Customer Satisfaction: Offer customers a seamless booking experience, making it easy for them to reserve tables and enjoy dining with you.
- Stay Organised: Keep track of bookings, cancellations, and special requests in one easy-to-access platform.
We’re here to make this process as smooth as possible, so if you ever feel stuck, refer back to this manual. Let’s get started on setting up your restaurant booking system and taking your reservation management to the next level.
Welcome to Kuulseats! Let’s get your restaurant registered and ready to start. This section will guide you through the registration process.
There is a possibility that your restaurant has been partially registered already, if this is the case go straight to 'Logging in for the first time';
https://business.kuulseats.com/guide#
Registering for the First Time
Go to the Join Page
- Open your web browser and navigate to kuulseats.com/join.

Enter the relevant information:
- Restaurant Name: Enter the name of your restaurant as it appears to your customers.
- Postcode: Enter the postcode for your restaurant.
- Contact Phone Number(s): Add the phone number(s) that should be used for operational questions.
- Contact Email: Provide the email address we should use for any operational questions.
- Contact First Name and Last Name: Enter the name of the main point of contact for operational queries.
- Password: Create a password and store this safely as you will need this to login. Choose something secure and memorable.
Tip: Make sure to choose an 8 character password that includes a mix of letters, numbers, and symbols for added security. Avoid using easily guessable passwords like "12345" or "password." - Promo Code: (if applicable): If you have a Promo Code enter this here.
- Membership: You may see a Membership dropdown field, if you do choose the membership which will be relevant to you.
Click to read the Terms and Conditions and tick the box to confirm this.
Press Join Now and this will take you through to the Business Profile section.
For those of you who prefer video - here is a video on Registering your business with KuulSeats.
Go to the Login Page
Open your web browser and navigate to kuulseats.com/login.

Enter Your Credentials
- Input your Email or Username and Password this would have either been set up by you at setup or provided to you by your admin.
- Click Login.
- If you have forgotten your Password click on the 'forgot your password' link and you will be able to reset the password.
Setting Up Security
- Create a New Password (if prompted): For first-time users, you may be asked to create a new password. Choose something secure and memorable.
Tip: Make sure to choose an 8 character password that includes a mix of letters, numbers, and symbols for added security. Avoid using easily guessable passwords like "12345" or "password."
Once you’ve logged in, you’ll be directed to the dashboard. Here’s how to find the Restaurant Profile section:
Click on "Admin & Set up".
Select “Business Details”.
This will open your restaurant’s profile page, where you can enter your basic details.
- Any fields which are highlighted, cannot be entered. These are display only and in some circumstances can only be edited by the KuulSeats Support team.
Welcome to your new restaurant booking system! This guide will walk you through the steps to set up your restaurant profile. Let’s get started.
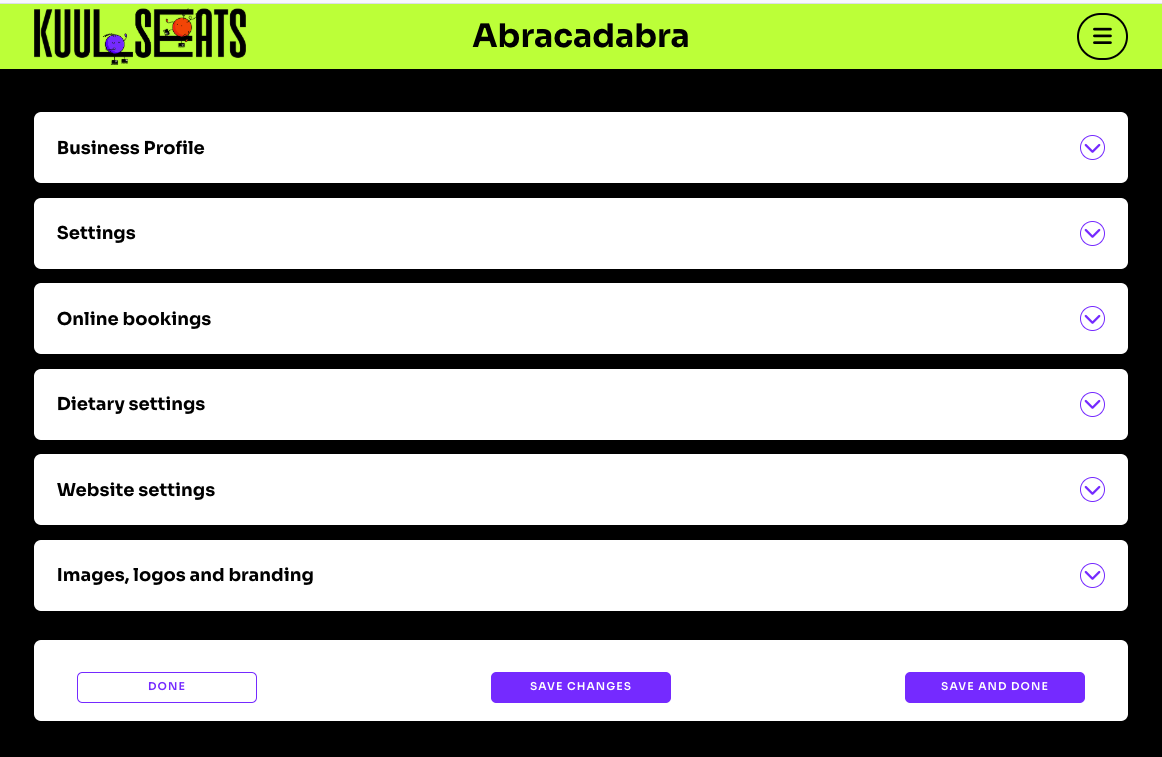
The design you see above is an accordion, if you click the arrows on the right hand side of the rows the row will open up to show you more information.
Business Profile
Click on Business Profile and you will see fields as follows:

- Restaurant Name: Enter the name of your restaurant as it appears to your customers.
- Restaurant Address: Input your restaurant’s full address.
- Business name is the same as above: If your business name matches the trading name of your restaurant, tick this box to save time.
- Business Name: Enter your registered business name if it differs from the trading name.
- Business address is the same as above: If your business address is the same as the restaurant address, tick this box to save time.
- Business Address: Input your official business address, if different from the restaurant address.
- Contact Name: Enter the name of the main point of contact for operational queries.
- Contact Email: Provide the email address we should use for any operational questions.
- Contact Phone Number(s): Provide the phone numbers that we should use to contact you for your operational questions. Enter one phone number per line.
For those of you who prefer video:
Creating your Business Profile
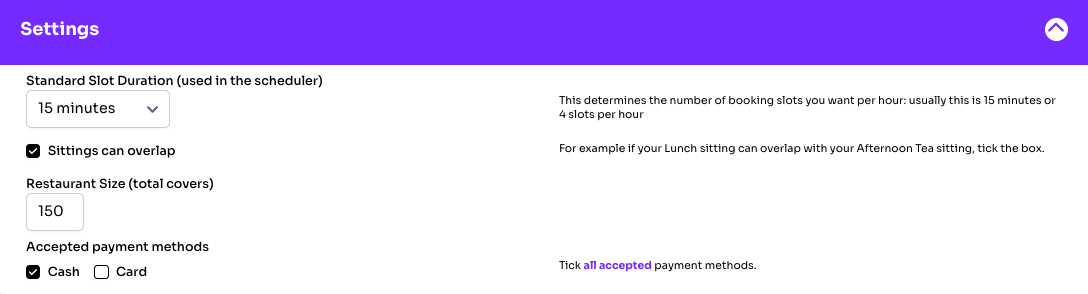
- Standard Slot Duration: Choose the standard slot duration for booking intervals, typically 15 minutes or 4 slots per hour, but can be different to suit your business..
- Sittings can overlap: If your dining sittings can overlap, such as lunch overlapping with afternoon tea, tick this box.
- Restaurant Size (total covers): Enter the total capacity of your restaurant in terms of covers (seating).
- Accepted payment methods: Tick all accepted methods of payment.
For those of you who prefer video:
Business Profile - Settings
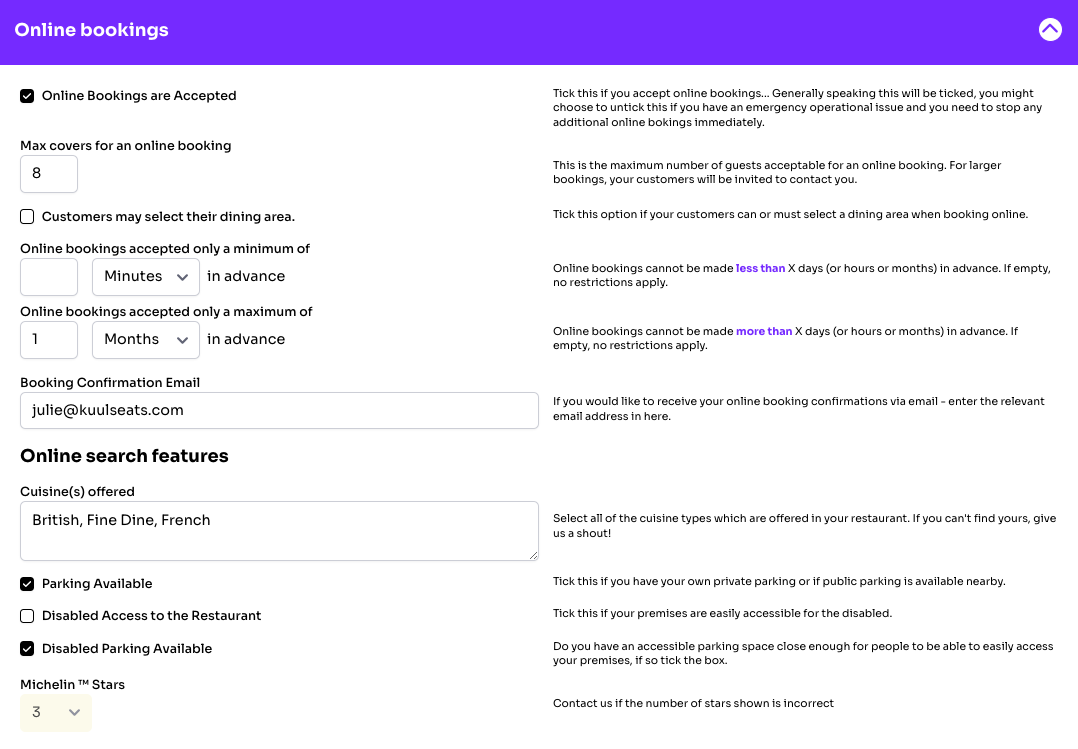
- Online Bookings are Accepted: Tick this box if you would like to accept online bookings.
- Max covers for an online booking: Set the maximum number of guests allowed per online booking.
- Customers may select their Dining Area: Tick this option if your customers can or must select their dining area. This would be useful if you have more than one dining area which are used for different styles of dining.
- Online bookings accepted only a minimum of: Set the minimum advance time (in minutes, hours, days, or months) required for online bookings.
- Online bookings accepted only a maximum of: Set the maximum advance time (in minutes, hours, days, or months) that bookings can be made.
- Booking Confirmation Email: Enter the email address where you would like to receive booking confirmations.
- Hide from Search: Tick this box if you do not want your restaurant to be found via online search (useful for emergency cases).
- Cuisine(s) offered: Select all of the cuisine types available at your restaurant.
- Parking Available: Tick this box if private or public parking is available nearby.
- Disabled Access to the Restaurant: Tick this box if your restaurant is accessible for disabled customers.
- Disabled Parking Available: Indicate if accessible parking is available near your premises.
- Michelin Stars: The number of Michelin stars your restaurant has can be added by our Support team at members@kuulseats.com
For those of you who prefer video:
Business Details - Online Bookings
Choose relevant options here to allow your customers to be able to select your restaurant based on their preferences.

For those of you who prefer video:
Business Details - Dietary Settings

- Your Custom Website: This URL (link) is automatically generated by our system as you register. This will show your customers details of your restaurant and will showcase your offerings.
- About Your Restaurant: Provide a brief description of what makes your restaurant unique.
- About Special Dietary Needs: Share information about how you accommodate special dietary needs.
- Your Link to KuulSeats Online Booking: Use this link to direct customers to your online booking page, add it to your own website to allow your customers to book online directly with you. This link can also be shared on social media.
- Phone Number(s): Enter the contact phone number(s) for customers to reach your restaurant.
- Email: Provide the email address for customer enquiries.
- Your Existing Website: Link to your current website if you have one.
For those of you who prefer video:
Business Details - Website Settings
You have the ability to add your logo and banner to personalise your KuulSeats space.

- Your Logo: Upload your restaurant’s logo to be displayed on the booking platform.
- Banner Image: Add a banner image that visually represents your restaurant’s atmosphere. This will be displayed at the top of your bookings page.
For those of you who prefer video:
Business Details - Website Settings
In this section, we’ll walk you through setting up and managing your restaurant's opening and closing times, including any special schedules, seasonal hours, and closures.
Access the Opening & Closing Times Menu
- Log in to your account at kuulseats.com/login.
- Navigate to Opening & Closing Times from the Admin & Set up menu. This is where you’ll manage all your schedule settings for regular hours, holidays, or other closures.

Add a New Schedule
- Click the Add button to start creating a new schedule for your restaurant.
This will open the Create New Schedule screen, where you can enter all the details about the new schedule.

Describe the Schedule
- In the Description field, enter a name for the schedule.
- Examples could be “Regular Hours,” “Christmas Closure,” or “Summer Extended Hours.”
If this schedule is specifically for a closure (e.g., public holidays or maintenance), tick the checkbox labelled This schedule is for a closure. Don’t forget that a dining room can be closed independently even when the rest of the restaurant is open. This is actioned in Dining Areas then Closures.
Set Open and Close Times
- In the weekly schedule section, you’ll see fields to enter the opening and closing times for each day.
- For each day of the week (Mon, Tue, Wed, etc.), enter the relevant opening and closing times in the appropriate fields.
- Example: Enter 09:00 AM - 10:00 PM, or 9AM - 10PM in the field for each day you want to set operating hours.
If your restaurant is closed on certain days, write closed or leave the fields blank for those days or tick the This schedule is for a closure box if this schedule is exclusively for closed periods.
Use the ‘Copy From’ Function (Optional)
- To save time, you can copy the opening and closing times from one day to multiple other days.
- To do this:
- Locate the Copy button or Copy From option.
- Select the day you’d like to copy (e.g., Monday) from the dropdown menu.
- Then, tick the boxes next to the days you want the same hours to apply to (e.g., Tuesday, Wednesday).
This function helps you quickly replicate your schedule across multiple days without manually entering each one.
Set Yearly Recurrence (Optional)
- If this schedule should recur every year (like seasonal hours or annual holidays), tick the ‘This is a seasonal schedule or a yearly-recurring schedule of some sort’ option.
- This will automatically apply the schedule on the specified dates each year, saving you time on future updates.
Define the Validity Period - optional field - this is really only needed for seasonal schedules.
- In the Valid From field, enter the date when this schedule should start.
- In the Valid Until (inclusive) field, enter the end date for this schedule.
- If the schedule has no end date, leave this field blank.
This feature is particularly useful for temporary schedules (e.g., summer hours) or closures (e.g., holiday shutdowns).
Final Check
- Once you’ve filled out all the relevant fields, review the details to ensure everything is accurate.
- Click Save to confirm the new schedule. Your restaurant’s hours will now reflect this schedule on the specified dates.
Tips:
- You can create multiple schedules for different times of the year (e.g., Winter Hours, Holiday Closures, etc.).
- If you ever need to temporarily close the restaurant (e.g., unexpected maintenance), create a closure schedule with the This schedule is for a closure option ticked, and set the appropriate start and end dates.
That’s it! You’ve successfully set up your restaurant’s opening and closing times. You can always return to this menu to adjust the schedule or add new ones as needed.
For those of you who prefer video:
Opening and Closing Hours Set up
In this section, we'll guide you through creating and configuring the dining areas in your restaurant, adding tables, and setting up rules for joining tables when needed.
Access the Dining Areas Menu
- Log in to your account at kuulseats.com/login.
- Navigate to Dining Areas from the Admin & Set up menu. This is where you'll define the different areas within your restaurant, like "Main Dining Room," "Terrace," or "Private Room."
Add a New Dining Area
- Click the Add button to create a new dining area.
- You’ll now see the New Dining Area screen.

Enter Dining Area Details
- In the Name field, enter the name of the dining area (e.g., "Main Dining Room" or "Outdoor Patio").
- Use the following tick boxes to specify the characteristics of the dining area:
- Disabled Access: Tick this if the area is accessible for customers with disabilities. You will be able to define this at table level later.
- Family Friendly: Tick this if the area is suitable for families.
- Highchairs Available: Tick this if highchairs are available in this area.
- Dog Friendly: Tick this if customers can bring dogs into this area.
In the Description field, you can add a brief description of the dining area if needed (optional).
In the Capacity field, enter the total seating capacity for this dining area.
When you’re done, click Save to save the dining area settings.
Add Tables to the Dining Area
- After saving the dining area, you’ll now have the option to add tables within it.
Click Add Table to begin adding a table to this dining area.

Enter Table Details
- In the Covers field, enter the maximum number of guests this table can seat.
- In the Table Number or Name field, give the table a unique identifier. This can be a table number (e.g., "101") or a name (e.g., "Window Table").
- Use the tick boxes to set table-specific options:
- Available for Online Bookings: Tick this if this table should be available for online bookings.
- Disabled Access: Tick this if the table is accessible for customers with disabilities. If you have a dining area with no disabled access it will remove "disabled access" from all tables of that dining area.
Once you’ve entered the details, click Save to confirm.
Note: Repeat this process for each table in the dining area until all tables have been added.
Define Table Joining Rules
Some dining areas may allow for flexible seating by joining tables together for larger groups. Here’s how to set up the rules for joining tables.
- Once all tables have been added, go to Table Joining Rules.
- Click Add Rule to create a new joining rule.

Configure Table Joining Rules
We know that you will know your restaurant set up like the back of your hand. We just need to get this into KuulSeats so that it can optimise the tables offered to your customers.
It might pay to start with a list of all of your tables which, when added together make a certain number of covers. Let’s start with by putting 6 in the Create tables with field. List all of the tables which make the 6 covers when joined, to the ‘by joining tables’ field. When you have completed all of the tables which when joined make 6, click Save.
Then repeat this process for all of the tables which when joined make 8 covers.
Final Check
- Once you’ve added the necessary joining rules, review all the details in the Dining Areas menu.
- Ensure each dining area, table, and table joining rule is set up correctly.
- You can edit any detail by clicking on the specific dining area or table and making changes as needed.
For those of you who prefer video:
Adding a New Dining Area.
Sittings help you manage different time slots or sessions when guests can book tables at your restaurant. For example, you might have a “Lunch Sitting” and a “Dinner Sitting” with different schedules and booking rules.
Access the Sittings Menu
- Log in to your account at kuulseats.com/login
- Go to Sittings from the Admin & Set up menu.
Add a New Sitting
- Click the Add button to create a new sitting.
- You’ll now see the New Sitting screen.
Enter Sitting Details
- In the Name field, enter the name of the sitting. This could be something like "Lunch," "Dinner," or "Brunch."
- In the Tagline field add a tagline which you would like to show in the Booking page which the customer will see. This could be something like, book before 17:00 for a free desert etc.
- Click Proceed to continue setting up the sitting schedule.
Set the Sitting Schedule
After naming the sitting, you’ll be taken to the scheduling section. Here’s how to fill out the schedule details:

- There’s a table which shows each day of the week where you’ll enter:
- First Booking: The earliest time guests can make a reservation for this sitting.
- Last Booking: The latest time guests can make a reservation for this sitting. The very last booking of the day added to the longest turnover time cannot be later than the close time.
- Turnover Times: The expected duration each booking will occupy a table.
Note: Turnover times should generally be entered in minutes. If you enter a number below 5, the system will interpret it as hours. For example, “2” means 2 hours, while “120” means 120 minutes (or 2 hours).
Booking Flow: Set the turnover time for different party sizes:
- 2: Turnover time for a table of 2 guests.
- 4: Turnover time for a table of 4 guests.
- 6: Turnover time for a table of 6 guests.
- 8+: Turnover time for larger tables, typically with 8 or more guests.
Under each day (e.g., Mon, Tue, etc.), adjust the turnover times as necessary for each party size (2, 4, 6, 8+). This allows you to control how long each table is occupied based on group size.
Flow: The Flow is the number of covers that you are happy to arrive within a slot. To use an example:
Sunday Lunch, everyone wants to arrive at 12 or 1, your chef needs them to be staggered. You can set your flow so that the system will only allow x number of people to book at 12 and once this number has been exceeded, KuulSeats will offer 2 alternative available options either side of 12. This will stagger your bookings and keep all chefs and customers happy!
This ‘rule’ can be overwritten by your waiting staff when they are booking people in manually.
Leaving Days Empty:
- If a sitting is unavailable on a specific day, leave the fields for that day blank, or clear them using the eraser icon.
Tip: For the First Booking and Last Booking times, you can enter just the hour (e.g., "5pm") or be more specific with hour and minutes (e.g., "5:30pm"). The system will interpret the times based on common formats.
Specify Available Dining Areas
Tell the system where this sitting is available.
- Below the weekly schedule, you’ll see the Available in Dining Areas section.
- Select the dining areas where this sitting will apply. For example, if "Dinner" sitting is available only in the "Main Dining Room," tick the box next to that dining area.
Set Validity Dates (Optional)
- If this sitting is seasonal (e.g., only available during certain times of the year), you can set a date range for it.
- Enter the Valid From date and the Valid Until date if applicable. This is useful for specific schedules like Christmas or Easter.
- Valid From: Enter the start date for this sitting (optional).
- Valid Until (inclusive): Enter the end date for this sitting (optional).
Note: Leave these fields blank if the sitting should be available year-round.
Copy function
- There is a copy function like we saw in Dining Areas where you can create a sitting for one day and then copy it across to other days in the week
Save the Sitting
- Once you have entered all details, review the schedule and settings.
- If everything looks correct, click Save to save the sitting.
Final Check
- After saving, return to the Sittings menu to confirm the new sitting appears as expected.
- You can edit or update any sitting by selecting it from the list and modifying the details.
That’s it! You’ve successfully set up a new sitting for your restaurant. You can repeat these steps to create additional sittings as needed, such as separate sittings for breakfast, brunch, lunch, or dinner.
Adding your staff to the system allows you to assign roles, manage permissions, and ensure that each person has access to the tools they need based on their responsibilities. Follow these instructions to set up staff profiles, including roles like Restaurant Managers and Waitstaff.
Access the Staff Menu
- Log in to your account at kuulseats.com/login.
- Click on the Staff icon from the Admin & Set up menu.
Add a New Staff Member
- Click the Add button to create a new staff profile.
- You’ll now see the New Staff Member form.
Enter Staff Details
- First Name: Enter the staff member’s first name.
- Last Name: Enter the staff member’s last name.
Create a Username
- In the Username field, click the Auto-Create Icon to generate a unique username for the staff member.
- Alternatively, you can manually enter a username if you prefer a custom format.
Set a Password
- Password: Enter a secure password for the staff member.
- Use the Eye Icon to reveal or hide the password as you type to avoid errors.
Note: Waiting staff will not receive passwords via email, so ensure you communicate these details directly if needed. Restaurant Managers, however, will have their passwords sent to them via email.
Enter Contact Information
- Contact Email: Enter the staff member's email address (if applicable).
- Restaurant Managers should have an email address listed here, as they will receive their password and system notifications via email.
- Waiting staff who don’t have an email address can leave this field empty, but be sure to securely share their login details as needed.
Contact Phone Number: Enter the staff member’s phone number for easy communication.
Assign the Role of Restaurant Manager (if applicable)
- If the staff member is a Restaurant Manager, tick the Restaurant Manager box.
- Restaurant Managers and Restaurant Owners have higher-level permissions and can manage other staff members in the system.
- This role should only be assigned to individuals responsible for overseeing daily operations and managing staff.
Save the Staff Profile
- Review all entered information to ensure accuracy.
- Click Save to add the staff member to your system.
Final Check
- Once saved, the new staff member will appear in the Staff list.
- You can edit or update their details anytime by selecting their profile from the list.
Additional Notes:
- Restaurant Managers and Owners have the authority to set up and manage other staff members. Only assign the Restaurant Manager role to those who require access to these settings.
- Waiting staff will not have their passwords emailed to them, so their login information will need to be communicated securely in person.
That’s it! You’ve successfully set up a new staff member. Repeat these steps to add additional team members as needed, assigning roles based on each individual’s responsibilities.
The Bookings section allows you to view, create, and update reservations in your restaurant. You can monitor booking statuses, manage reservations, and adjust details as needed. Here’s how to use the booking scheduler effectively.
Access the Booking Scheduler
- Log in to your account at kuulseats.com/login.
- Click on the Bookings Icon in the main menu. This will open the booking scheduler.
Understanding the Booking Scheduler
When you open the scheduler, you’ll see a visual timeline of bookings for your restaurant.
Date: Along the top you will see the date, you can click here to select any date.
Bookings and Covers: You will be able to see how many individual bookings you have for each day and the number of respective covers for those bookings.
Today: There is a button to take you back to Today if you are currently in a different date.
Any existing bookings will be displayed here, colour-coded by their status:

- Booked: Displayed in purple, indicating that the reservation is confirmed but the customer has not yet arrived.
- Arrived: Displayed in mustard, a warning colour to indicate the customer has arrived but hasn’t been seated yet.
- Seated: Displayed in green, indicating that the customer has been seated at their table.
- Complete: Displayed in black, showing that the booking is finished.
- No Show: Not displayed on the scheduler; used when the customer didn’t arrive.
- Cancelled: Not displayed on the scheduler; used for bookings that have been officially cancelled.
Bookings for Today
The view is slightly different for bookings for ‘Today’ than for other days.

- Booked:
Displayed in purple, indicating that the reservation is confirmed but the customer has not yet arrived.
- Arrived:
Displayed in mustard, a warning colour to indicate the customer has arrived but hasn’t been seated yet.
- Seated:
Displayed in green, indicating that the customer has been seated at their table.
If you click on the flags above the system will move the booking to the next status.
- Complete:
Displayed in black, showing that the booking is finished.
- Table Joins:
Tables which have been joined.
- Online Bookings:
This icon shows that this booking has been made by the customer online. All other bookings have been set up within the restaurant.
- Customer Notes:
This icon shows that the customer has added a note to the booking.
- Restaurant Notes:
This icon shows that the restaurant has created a note on this booking.
- Click on an Empty Time Slot or select New Booking from the right hand burger menu
- To create a new booking, simply click on an available time slot in the scheduler. A New Booking popup will appear.
Position the Popup
- You can drag the popup to a convenient location on your screen by clicking and holding anywhere within the popup window.

Enter Booking Details
Within the New Booking popup, you’ll see several fields for entering booking information. Here’s a breakdown of each field:
- Date: Select the booking date from the dropdown menu. Default is the current date.
- Time: Choose the time of the booking from the dropdown menu (e.g., 17:00).
- Sitting: Select the sitting period for the booking (e.g., "Supper") from the dropdown menu. This will be preselected if there is only one sitting available at this time.
- Covers: Enter the number of people in the party. You can override the maximum number of covers (maximum 2 covers more) over the maximum number of online covers set.
- Dining Area: Choose the dining area where the reservation will be seated (e.g., "Main Floor").
- Table: Select a specific table for the reservation. Tables are listed by their names or numbers (e.g., "Elm").
- Additional Requirements: Use the tick boxes for any special accommodations:
- Family Friendly: Tick if the reservation requires family-friendly seating.
- Highchair(s) Required: Tick if the party requires one or more highchairs.
- Disabled Access: Tick if the reservation needs disabled access.
- Dog Friendly: Tick if the reservation includes a customer bringing a dog.
Find Table: Click this button if you need the system to suggest an available table based on the covers and selected criteria.
Customer Contact Information:
- Phone: Enter the customer’s phone number (mobile preferred).
- Email: Enter the customer’s email address for confirmation and communication.
Customer Name:
- First Name: Enter the first name of the customer.
- Last Name: Enter the last name of the customer.
Set the Booking Status
- You’ll see several tick boxes at the bottom of the New Booking popup to indicate the reservation status:
- Booked: Tick this box if the reservation is confirmed (this is typically selected by default).
- Arrived: Tick this box once the customer arrives at the restaurant.
- Seated: Tick this box when the customer has been seated at their table.
- Completed: Tick this box when the customer has finished and paid for their meal.
For a new booking the system will default to Booked, so you won’t need to tick this box.
Add Notes
- Your Notes: Enter any additional notes for internal use, such as special arrangements or reminders for staff.
- Customer Notes: This field can include any notes the customer provided when making the reservation (e.g., dietary restrictions, special requests).
Save the Booking
- Once all details have been entered, review them for accuracy.
- Cancel/Confirm Booking:
- Click Confirm Booking to save the reservation.
- Alternatively, click Cancel to discard the booking if you need to start over.
Updating a Booking’s Status
As the customer journey progresses, you can update the booking’s status in real-time on the scheduler:
- Booked: When a reservation is first created, it will be marked as Booked (purple).
- Arrived: When the customer arrives, change the status to Arrived (mustard) to indicate they are in the restaurant but not yet seated.
- Seated: Once the customer is seated at their table, update the status to Seated (green).
- Complete: When the customer leaves, mark the booking as Complete (black).
- No Show: If the customer does not arrive, mark the booking as No Show. This status will not display on the scheduler.
- Cancelled: If the customer cancels, change the status to Cancelled. Cancelled bookings also do not display on the scheduler.
Final Tips for Managing Bookings
- Real-Time Updates: Keep booking statuses updated throughout the day to ensure accurate tracking and smooth service flow.
- Communicating Changes: For bookings with special requirements, make sure staff are aware by using Your Notes or Customer Notes.
- No Shows & Cancellations: These bookings will not appear on the scheduler but will be logged for reporting purposes, allowing you to track no-show trends over time
In addition to the main booking scheduler, the right-hand side menu provides several options to streamline your booking management experience. These options allow you to quickly add new bookings, find specific reservations, view cancellations and no-shows, and more.
To access this menu, click on the burger menu (three horizontal lines) on the right-hand side of the Bookings page.

Right-Hand Side Menu Options
Here’s an overview of each option in the menu:
- New Booking:
- Use this option to quickly create a new booking. Clicking New Booking will open a booking form similar to the one you’d access by clicking on a time slot in the scheduler.
- Enter all required booking details (date, time, covers, customer information, etc.), then click Confirm Booking to save it.
Find Booking:
- Use Find Booking to search for a specific reservation without scrolling through the scheduler.
- When you click this option, you’ll see a search field where you can enter the booking details such as the customer’s name, phone number, or booking reference.
- This is especially useful during busy periods when you need to locate a particular booking quickly.
View Cancellations and No-Shows:
- This option lets you view a list of all cancellations and no-shows that have been recorded in the system.
- Since cancellations and no-shows do not appear directly on the booking scheduler, this view allows you to track missed reservations and identify trends over time.
- Click View Cancellations and No-Shows to open a separate window with details on each cancelled or missed booking, including the date, time, and customer information.
- Click View Cancellations and No-Shows to return to the bookings page.
Go to Date:
- Use the Go to Date option to jump to a specific date on the scheduler.
- Clicking this option will open a date picker. Select the desired date, and the scheduler will automatically display bookings for that day.
- This feature is particularly useful when you need to view bookings for future dates, like upcoming holidays or special events.
Hide Top Banner:
- The Hide Top Banner option allows you to remove the top banner from the screen, providing a cleaner and larger view of the booking scheduler.
- This can be useful for those who prefer a more minimalistic interface or need extra screen space to view bookings in detail.
- You can click Hide Top Banner again to bring the banner back.
Using the Right-Hand Side Menu Efficiently
These options are designed to make booking management more efficient. Here are a few tips:
- Quick Access to Bookings: Use Find Booking during peak times to locate reservations quickly, especially if a customer arrives and you need to confirm their booking.
- Tracking Trends: Check View Cancellations and No-Shows regularly to understand patterns and reduce no-shows in the future.
- Streamlined Navigation: The Go to Date feature allows you to plan and organise bookings around special events or peak periods without manually scrolling.
We are using the concept of Orphan bookings when a booking becomes detached from the date or time that it was originally booked for. This can occur when the restaurant or a dining area is closed, after there have been bookings made in that area. This can also happen if you remove tables or change table numbers and covers when bookings have already been made.
You will see these at the top of the Bookings screen.

You will need to click into each one of these and re-arrange the booking to a suitable dining area or a different day if the restaurant has been closed.
Booking Confirmation Email
An email sent to confirm a customer's reservation. The system can be configured to send booking confirmations to a designated email address for record-keeping.
Capacity
The maximum number of people that a dining area, table, or the entire restaurant can accommodate at one time.
Cuisine Types
The types of food offered at the restaurant (e.g., Italian, Indian, American). This field helps categorise the restaurant's offerings for online searches and customer information.
Dining Areas
Separate sections within the restaurant where customers can dine. Dining areas may have different characteristics (e.g., disabled access, dog-friendly, highchair availability) and are configured in the system to manage seating arrangements effectively.
Flow Rate
A setting used to manage capacity and timing for online bookings, ensuring that the kitchen or service staff doesn’t become overwhelmed by too many orders or guests at once.
Orphan Bookings
Orphan bookings are when a booking becomes detached from the date or time that it was originally booked for, usually as a result of a restaurant or dining area being closed after the booking has been made.
Online Bookings
Reservations made through the restaurant’s online booking system. These can be controlled based on availability, restrictions, and other settings such as maximum guest count per booking.
Sittings
Distinct time slots (e.g., Breakfast, Lunch, Dinner) during which reservations are available. Sittings help manage bookings by dividing the day into service periods.
Slot Duration
The default amount of time a table is reserved for a booking. Commonly set in intervals like 15 minutes or 30 minutes, this helps manage table turnover efficiently.
Staff Roles
Different permissions and responsibilities assigned to staff members in the system. Examples include Restaurant Manager, who has the authority to manage other staff, and Waiting staff, who typically have limited access.
Table Joining Rules
Guidelines in the system that allow certain tables to be combined for larger parties. Rules can be set to combine tables in pairs or groups, helping to maximise seating flexibility.
Turnover Time
The time required between seatings to clean, prepare, and re-set a table for the next reservation. Setting an appropriate turnover time helps ensure smooth service transitions.
Valid From /Valid Until
Fields used to specify a date range for schedules, sittings, or special rules. Commonly used for seasonal or temporary changes like holiday hours.
1. How do I set up my restaurant’s business profile?
To set up your restaurant’s business profile, go to the Business Profile section. Here, you can enter essential information like the restaurant's name, address, contact details, and business settings. This profile information is important as it will be displayed to customers and used for communication.
2. Can I disable online bookings temporarily?
Yes. If you need to stop accepting online bookings due to an emergency or other operational issue, go to the Online Bookings section and untick the Online Bookings are Accepted option. This will immediately halt online reservations. Alternatively you can close a Dining Room or the whole restaurant in a real emergency. This can be done in Dining Areas or Opening and Closing Times.
3. How do I manage opening and closing times?
In the Opening & Closing Times section, you can create schedules that specify when your restaurant is open for service. Use the Add button to set up new schedules, enter opening and closing times for each day, and set date ranges if needed for seasonal or one-time schedules.
4. What is the “Flow Rate” for, and how should I set it?
The Flow Rate is a setting in the Dining Area section that helps manage the number of guests per time slot to prevent the kitchen from being overwhelmed. Set a flow rate that matches your kitchen’s capacity to ensure smooth service and avoid too many orders at once.
The Flow is the number of covers that you are happy to arrive within a slot. To use an example:
Sunday Lunch, everyone wants to arrive at 12 or 1, your chef needs them to be staggered. You can set your flow so that the system will only allow x number of people to book at 12 and once this number has been exceeded, will offer 2 alternative available options either side of 12. This will stagger your bookings and keep all chefs happy!
This ‘rule’ can be overwritten by your waiting staff when they are booking people in manually.
5. How do I add dining areas and tables?
To add dining areas, go to the Dining Areas section, click Add, and fill in the details such as the area name, capacity, and any specific characteristics (e.g., Disabled Access, Dog Friendly). After saving, you can add individual tables within each area and specify settings like the number of covers, table name or number, and online booking availability.
6. Can I copy opening times from one day to others?
Yes. In the Opening & Closing Times section, after entering the times for one day, use the Copy From function to replicate the same times for other days. This can save time when setting up a regular schedule across multiple days.
7. How do I create sittings, and why are they important?
Sittings represent specific meal times (like Lunch or Dinner). Go to the Sittings section, click Add, and enter the times for the first and last bookings as well as turnover times. Sittings help control when customers can book tables, allowing you to manage different service periods effectively.
8. How can I assign a Restaurant Manager role to a staff member?
When adding a new staff member in the Staff section, tick the Restaurant Manager box if the staff member is responsible for managing others. Restaurant Managers have access to more features, including the ability to add and edit other staff profiles.
9. Do I need to enter a password for each staff member?
No. When setting up a new staff member, you’ll need to enter a password in the Password field for Restaurant Managers, they will receive their passwords via email. For other staff like Waiting staff a password is optional and will need to be communicated to them directly, as they may not have an email address in the system.
10. How do I set a seasonal or special schedule?
In both Opening & Closing Times and Sittings, you can set a Valid From and Valid Until range to create a schedule that applies only within a specific time frame. This is useful for events like holidays, seasonal hours, or one-off closures.
11. Can I make edits to existing bookings?
Depending on your system’s permissions, you may be able to edit, reschedule, or cancel existing bookings. Check with your Restaurant Manager or Administrator if you encounter any issues with booking modifications.
12. What are the Special Dietary Requirements fields for?
These fields allow you to specify any dietary accommodations your restaurant provides (e.g., vegetarian, gluten-free). Customers can see this information when booking, helping them make informed decisions based on their needs.
13. How can I update my contact details in the system?
Go to the Business Profile section to update contact information, including email addresses and phone numbers. Ensure these details are accurate so that customers and system notifications reach the correct contacts.
14. How does the system handle disabled access and family-friendly options?
In both the Dining Areas and Tables setup, you have tick boxes to indicate features such as Disabled Access, Family Friendly, Highchairs Available, and Dog Friendly. Setting these attributes ensures customers are informed about the facilities available in each area.